Boards
Arduino Nano
Pinout
代码为外侧紫色数字
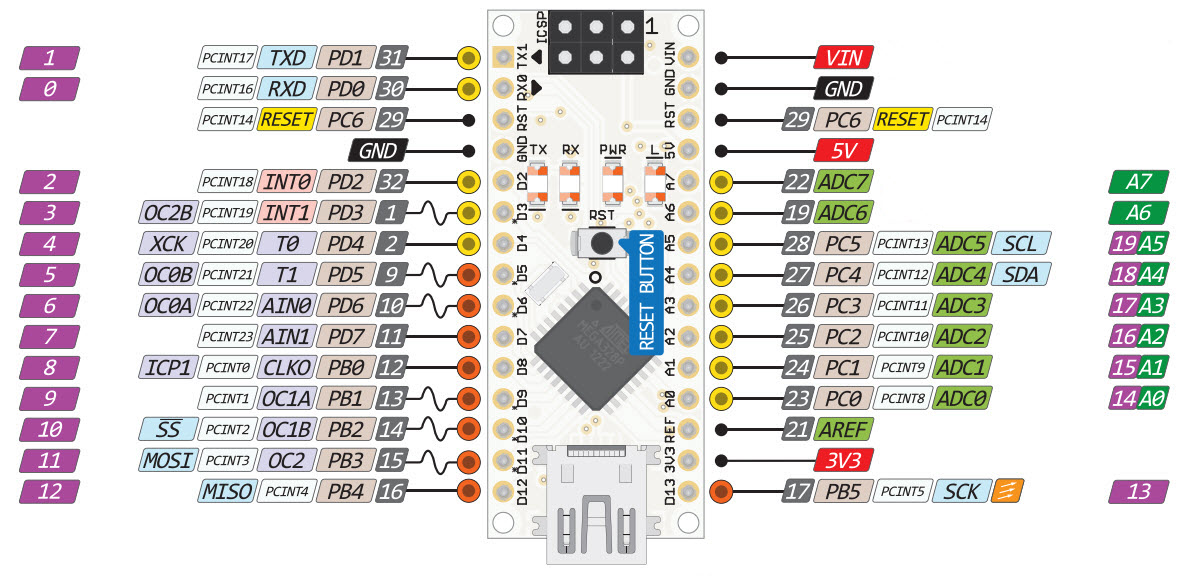
- built-in led: 13
ESP8266
Install
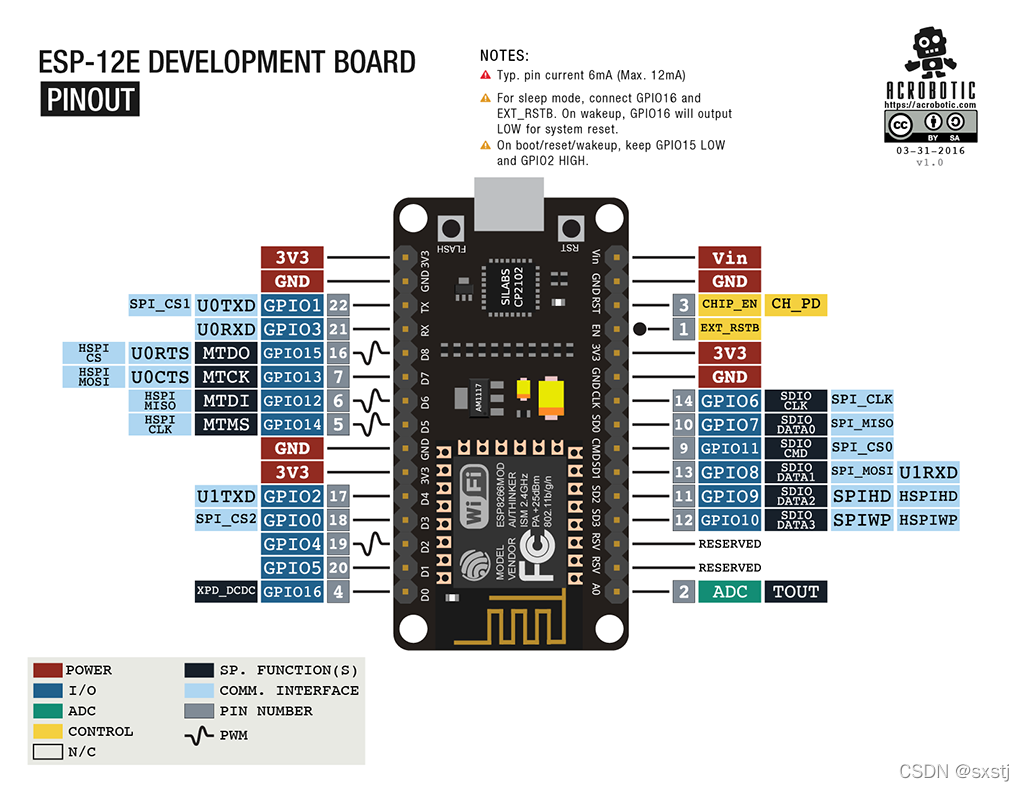
Pinout
| 1 | 2 | 3 | 4 | 5 | 6 | 7 | 8 | 9 | |
|---|---|---|---|---|---|---|---|---|---|
| 开发板管脚 | D0 | D1 | D2 | D3 | D4 | D5 | D6 | D7 | D8 |
| 芯片管脚 | 16 | 5 | 4 | 0 | 2 | 14 | 12 | 13 | 15 |
电机驱动板:esp8266 motor shield
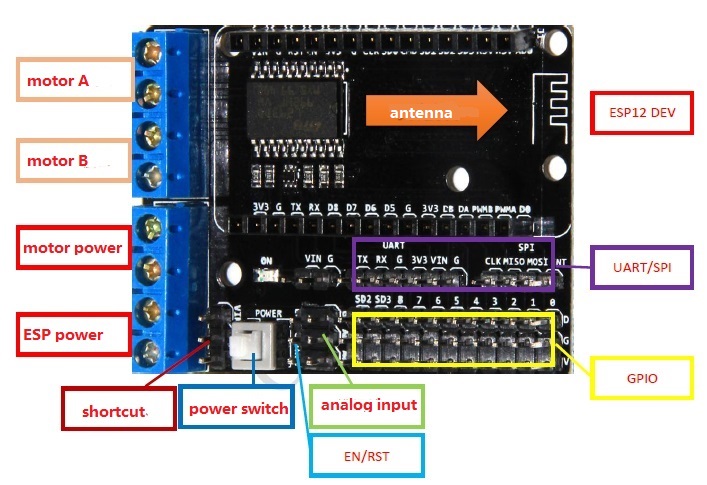
- 电机电源(VM):4.5V~36V,可单独供电
- 控制电源(VIN):4.5V~9V,可单独供电
- 可以短路 VM 和VIN,使用一个电源(4.5V~9V)同时给电机与控制供电
| Board pin | NodeMCU GPIO | Arduino IDE |
|---|---|---|
| A power | 1 | 5 or D1 |
| A direction | 3 | 0 or D3 |
| B power | 2 | 4 or D2 |
| B direction | 4 | 2 or D4 |
definition: pins.h
#define pinLed 16

#define pwmMotorA D1
#define pwmMotorB D2
#define dirMotorA D3
#define dirMotorB D4
usage
int motorSpeed = 100; // use analogWrite(pin, val) to set speed, range from 0 to 255
int interval = 2000;

void Car::init()
{
    pinMode(pinLed, OUTPUT);
    pinMode(pwmMotorA, OUTPUT);
    pinMode(pwmMotorB, OUTPUT);
    pinMode(dirMotorA, OUTPUT);
    pinMode(dirMotorB, OUTPUT);

    digitalWrite(pwmMotorA, LOW);
    digitalWrite(pwmMotorB, LOW);
    digitalWrite(dirMotorA, LOW);
    digitalWrite(dirMotorB, LOW);

    Serial.println("Initialized");
}

void Car::turnLeft(int t, int speed)
{
    Serial.println("Turn left");
    analogWrite(pwmMotorA, speed);
    analogWrite(pwmMotorB, 0);
    digitalWrite(dirMotorA, LOW);

    delay(t);

    analogWrite(pwmMotorA, 0);
}

void Car::turnRight(int t, int speed)
{
    Serial.println("Turn right");
    analogWrite(pwmMotorA, 0);
    analogWrite(pwmMotorB, speed);
    digitalWrite(dirMotorB, HIGH);

    delay(t);

    analogWrite(pwmMotorB, 0);
}
References
Examples
- ESP8266WiFi -> WiFiAccessPoint
References
ESP32CAM
Install
Usage
requests:
-
get status:
curl -XGET http://{ip}:80/status -
set params:
curl -XGET http://{ip}:80/control?var=framesize&val=7 -
get stream:
curl -XGET http://{ip}:81/stream
References
- GitHub - espressif/arduino-esp32: Arduino core for the ESP32
- GitHub - arkhipenko/esp32-cam-mjpeg: ESP32 mjpeg streaming server
ATTINY85
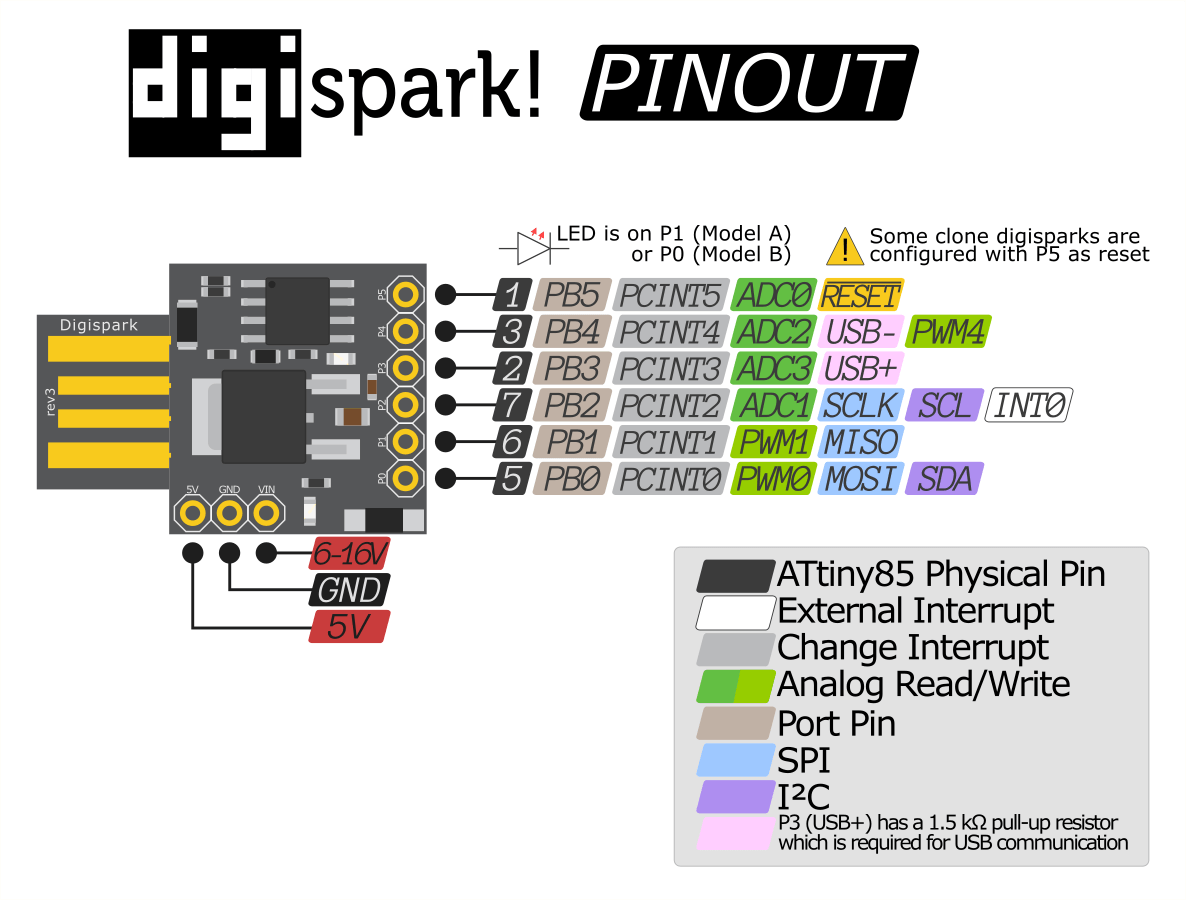
Pinout
ATTINY88
Install
- https://dl.espressif.com/dl/package_esp32_index.json
- 驱动:https://github.com/digistump/DigistumpArduino/releases/download/1.6.7/Digistump.Drivers.zip
Pinout
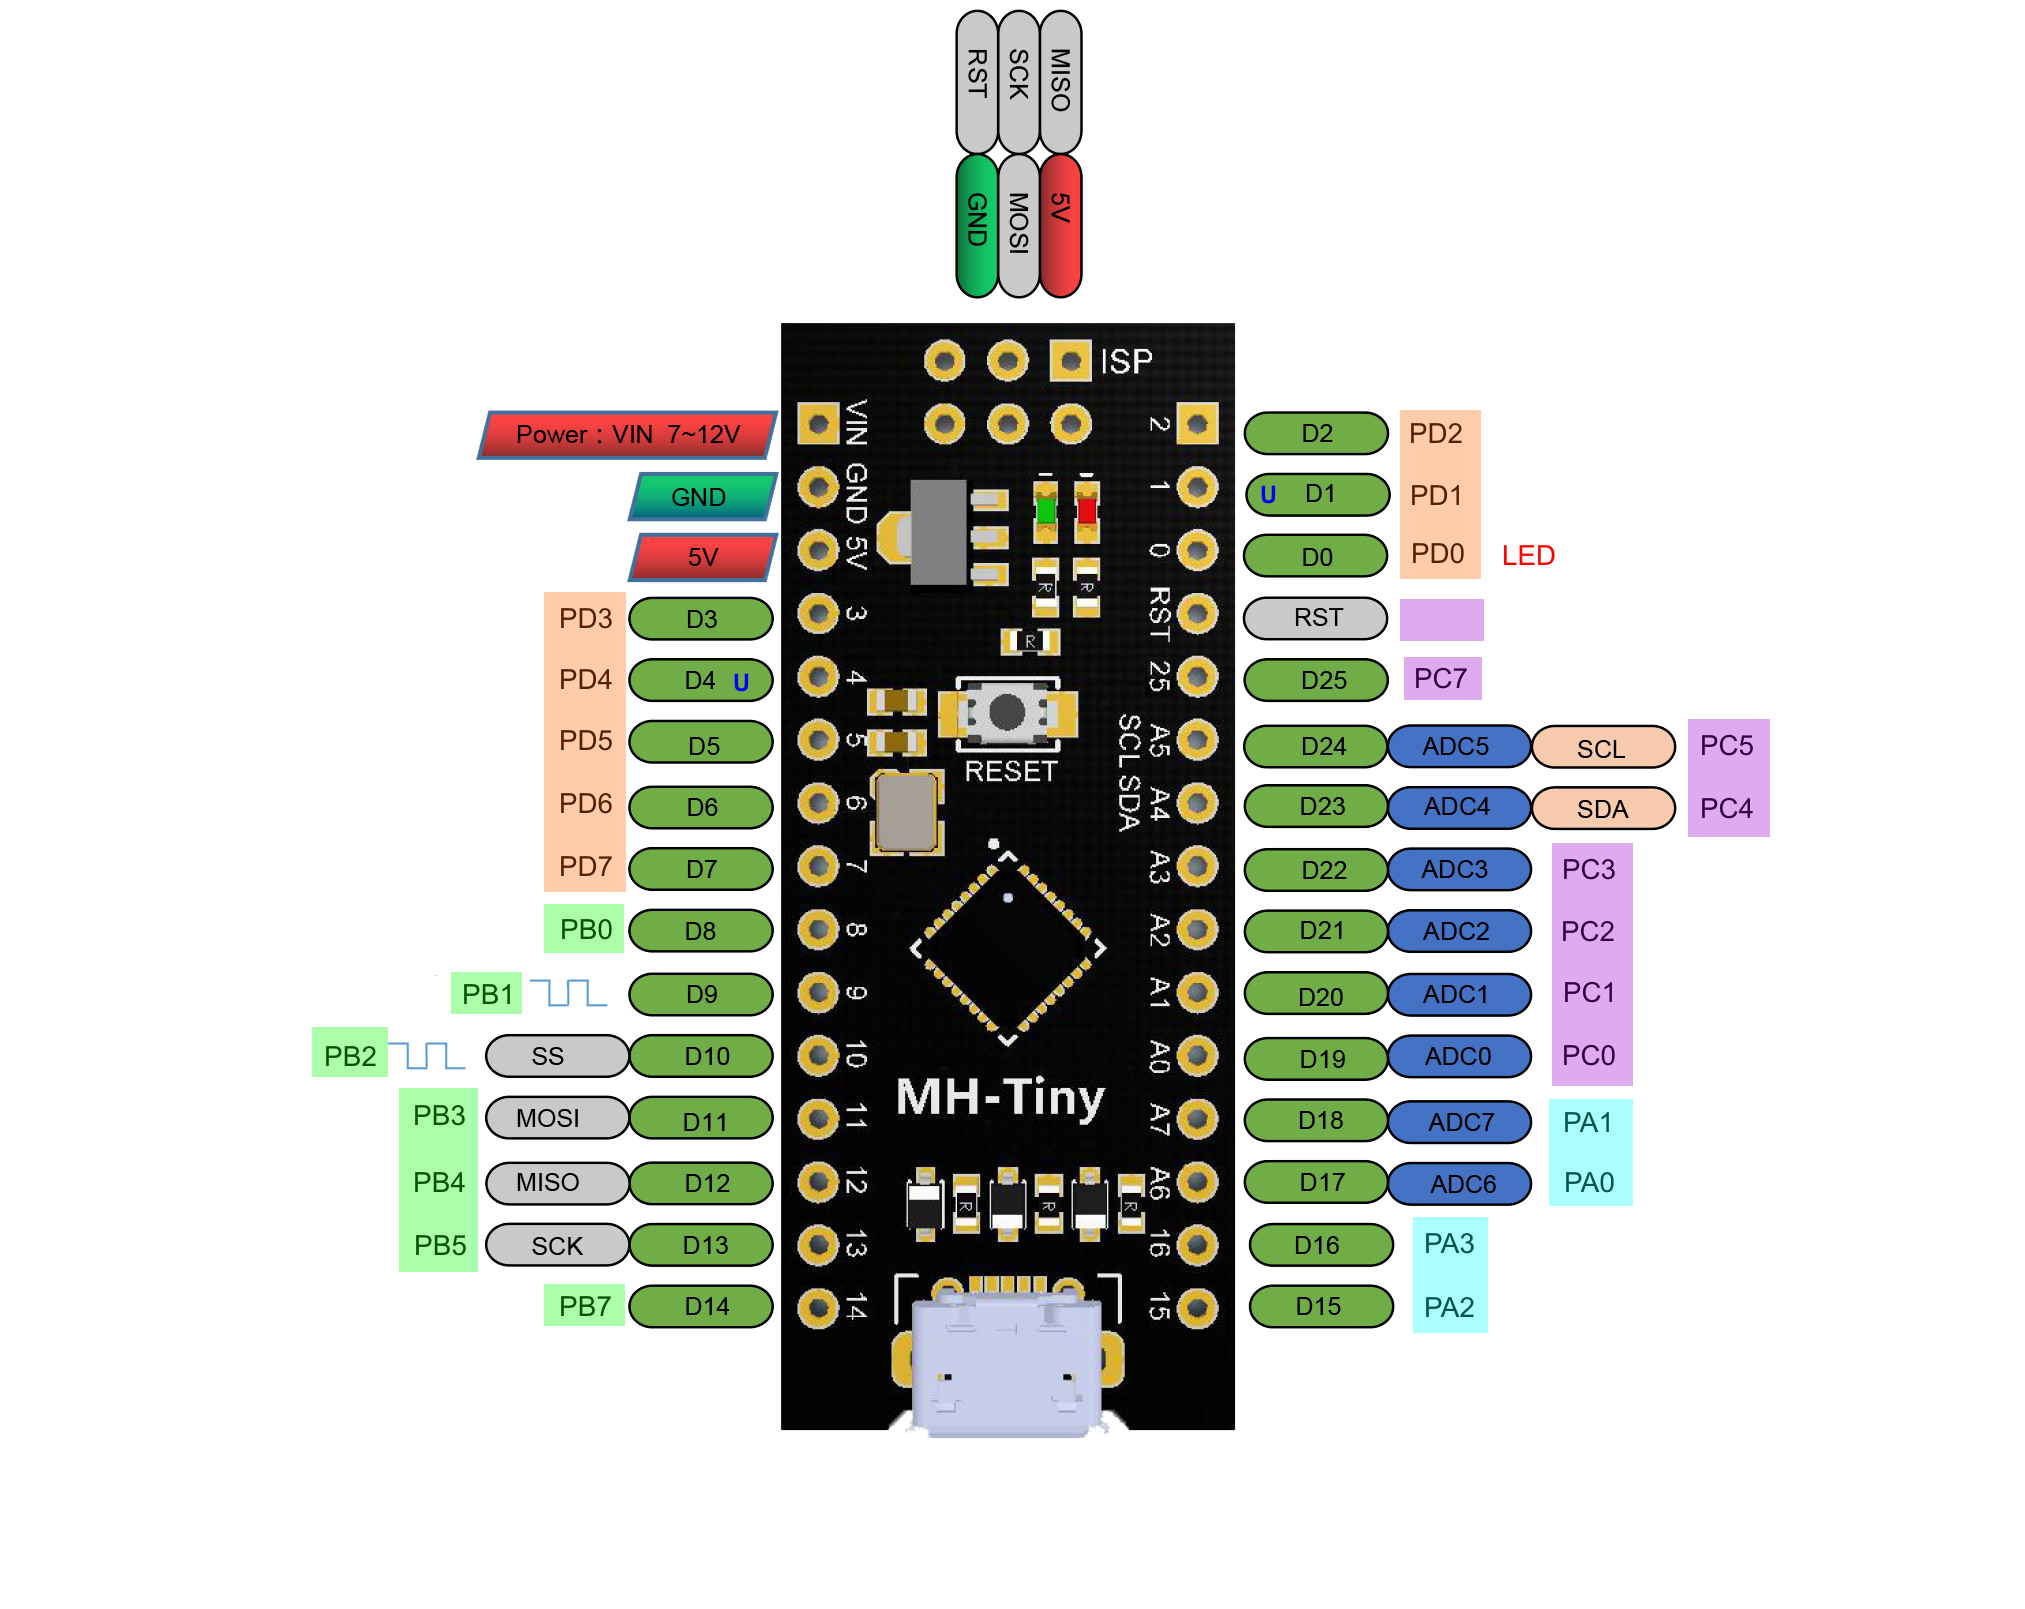
References
问题
- 如果下载不了index,可以直接复制文件到
preferences.txt所在文件夹